

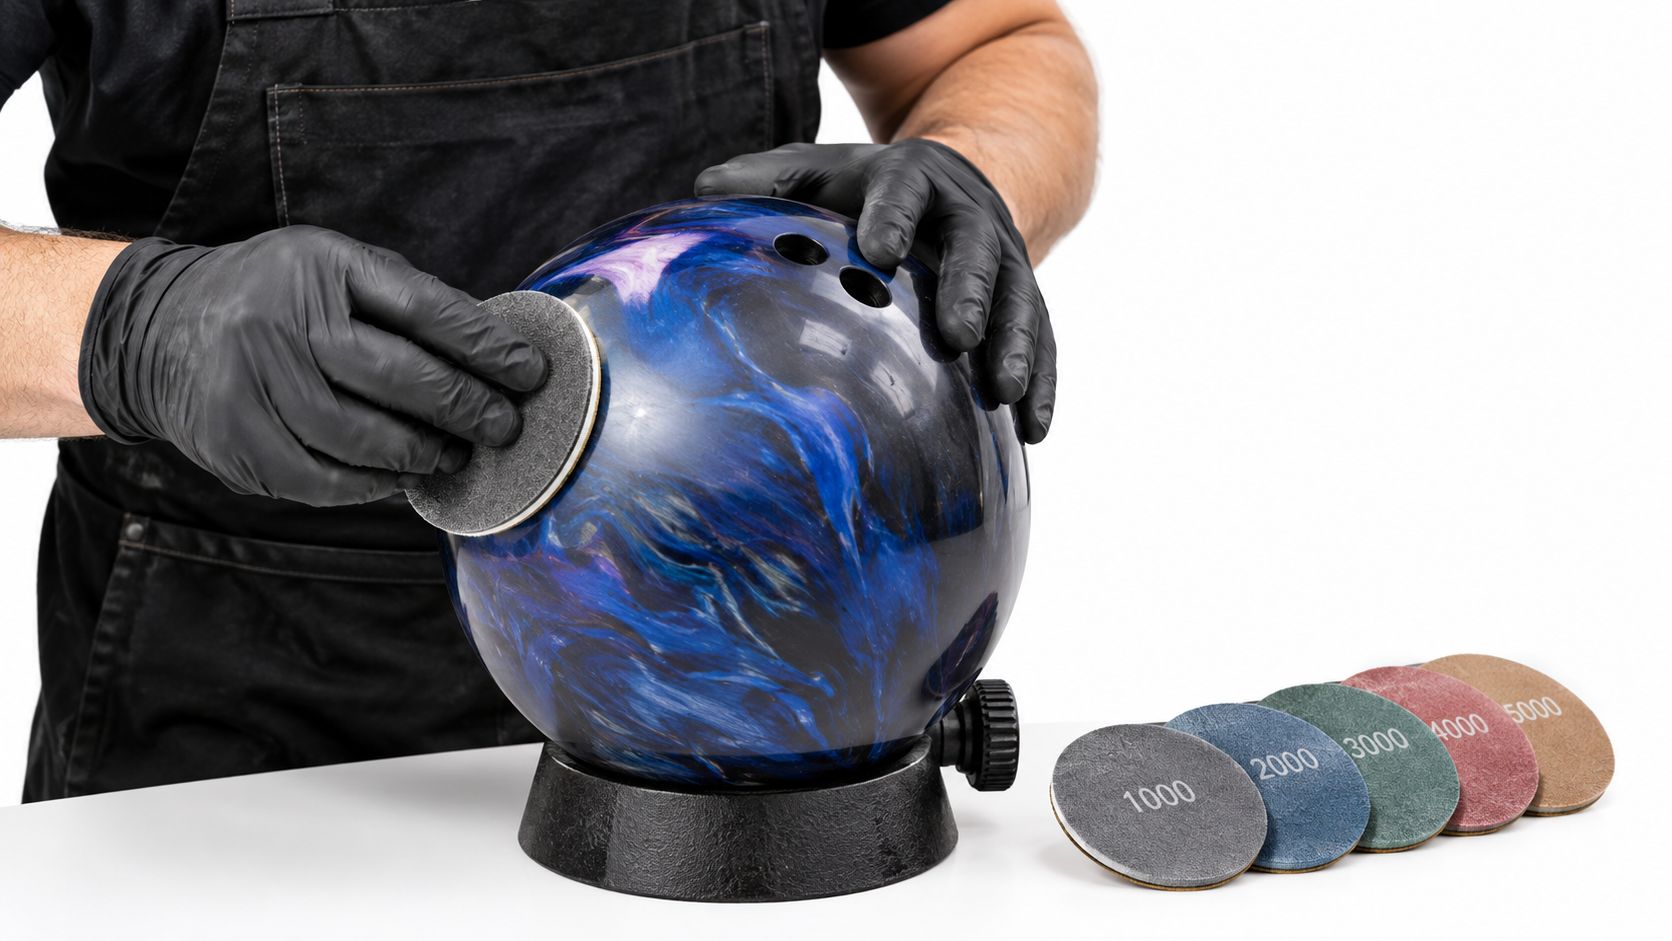
You've cleaned the ball, made the same swing, and watched the same target. Yet on one pair it reads the midlane and rolls through the pins, while on the next it skids too long or hooks before it reaches the breakpoint. Before you rebuild your release, check the coverstock. Oil, lane transition, and surface wear can change the ball-to-lane contact enough to make familiar equipment look unpredictable.
Bowling ball sanding gives you a controlled way to change that contact. A rougher finish creates more friction and earlier hook, while a smoother finish preserves skid and delays the move. The important part isn't copying a grit number from someone else. It's applying the finish evenly, choosing it for the lane in front of you, and knowing when a light touch-up has become unnecessary material removal.
Table of Contents
- Why Your Ball Reaction Feels Off and How Sanding Fixes It
- The Short History of Bowling Ball Surfaces
- Tools and Workspace Setup Before You Start
- The Full Grit Progression Step by Step
- Matching Surface Finish to Lane Conditions
- How Often You Should Actually Resurface
- Your Resurfacing Checklist Before You Roll Again
Why Your Ball Reaction Feels Off and How Sanding Fixes It
A ball that feels “lazy” usually isn't suffering from a mysterious release problem. The coverstock may have picked up oil, the track area may have become polished by lane contact, or the pair may have transitioned enough that your previous surface no longer fits. A shiny track area can reduce traction in the midlane, causing the ball to skid farther and arrive at the pocket without enough continuation.
Surface adjustment changes that interface. Sanding creates microscopic texture in the coverstock, and that texture affects how quickly the ball exchanges skid for traction. More texture generally produces an earlier read and stronger grip. Less texture lets the ball retain energy for a later move. The same core can therefore produce a very different shape when you change the surface.
If you're still learning how coverstocks differ, this comparison of reactive, urethane, and plastic bowling balls provides useful context. Sanding is most commonly used to tune resin coverstocks, but the correct response always depends on the ball's chemistry, core, layout, and the bowler's release.
Read the motion before reaching for a pad
Start with what the ball is doing, not what grit you happen to own.
- Early hook and weak continuation: The ball is using too much energy before the breakpoint. A smoother finish may help it retain length.
- Long skid and weak pocket entry: The cover isn't creating enough traction soon enough. A lower finish can make the ball read earlier.
- Unpredictable breakpoint: Uneven wear or incomplete sanding may be producing different friction zones around the shell.
- Reaction changes during a session: Oil transfer and surface wear may be changing the finish after repeated shots.
Practical rule: Sanding should solve a defined reaction problem. If you can't describe the ball motion you're trying to change, don't change the surface yet.
The reliable process is straightforward. Clean the ball, treat the whole surface uniformly, progress through abrasives without leaving coarse scratches underneath, and test the final finish on the actual lane condition. That approach replaces guesswork with a repeatable adjustment.
The Short History of Bowling Ball Surfaces
Bowling balls didn't always need this level of surface management. Materials moved from wood to hard rubber in the early 1900s, then to polyester in the late 1950s and early 1960s. Polyurethane coverstocks took hold in the 1980s, reactive resin appeared in the early 1990s, and particle coverstocks followed later that decade, according to this history of bowling ball resurfacing.
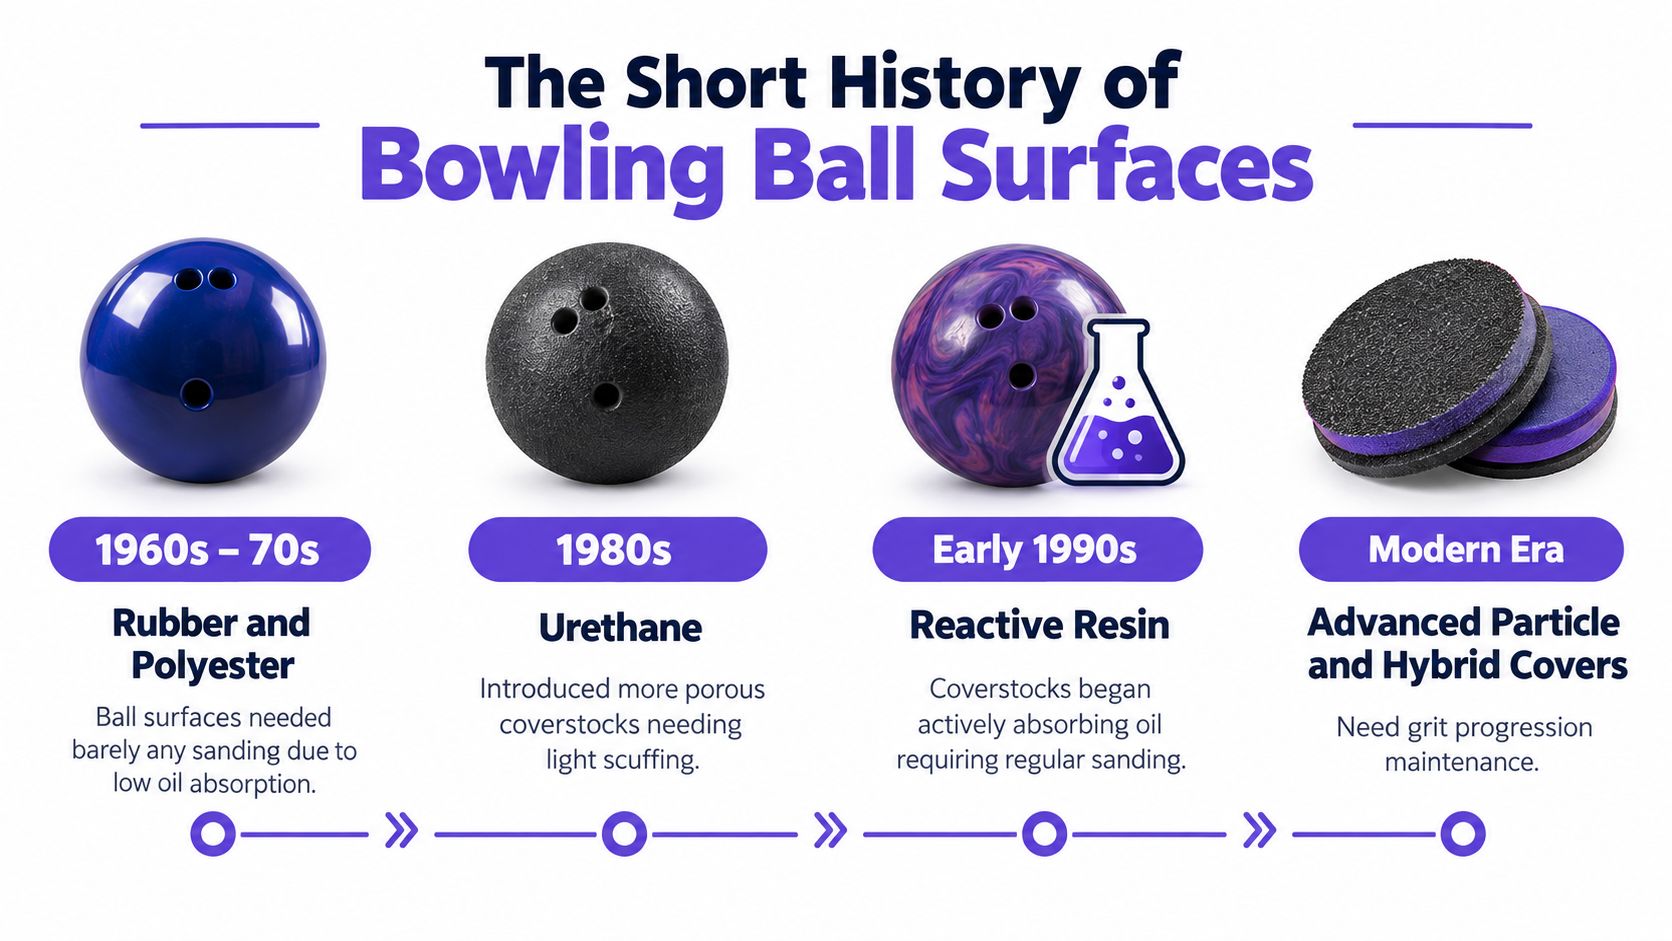
Each material changed the maintenance conversation. Early rubber and polyester balls offered less oil interaction, so bowlers had fewer reasons to manipulate texture. Urethane introduced a different friction profile, but modern resin shells made surface condition a central part of ball motion. These covers interact with lane oil and can lose their intended texture through use, cleaning, and contact with the lane.
Why reactive resin changed the job
Reactive resin gave bowling balls more traction potential, particularly when the coverstock was prepared with a textured finish. That created a useful trade-off. Rougher surfaces could read earlier in oil, while smoother or polished finishes could preserve skid and create a later response. Sanding became a practical way to manage that trade-off instead of accepting one factory reaction in every environment.
Particle and hybrid designs added more variation. Two balls with similar layouts can still behave differently because their covers respond differently to the same abrasive. The pro shop's job evolved from drilling equipment to managing the shell's texture with pads, spinners, and repeatable finish specifications.
Today, surface work isn't cosmetic maintenance. It's reaction tuning. The finish determines how much traction the ball creates before the breakpoint, how much energy remains for the backend, and how predictable the transition looks as the lane changes.
Tools and Workspace Setup Before You Start
A consistent finish starts before the first abrasive touches the ball. Dust, old oil, pet hair, and worn pads can create a surface that looks prepared but reacts unevenly. A ball spinner remains the best option because it keeps rotation consistent and lets you cover the entire shell without relying on hand speed.
Beginners can work with a stable ball cup and disciplined hand rotation, but the result takes longer and demands more attention. A low-speed drill mounted securely on a stand can help a cash-conscious bowler, provided the ball is held safely and the rotation doesn't introduce heat or uncontrolled pressure.
Essential Sanding Toolkit
| Tool | Beginner | Pro Shop |
|---|---|---|
| Ball rotation | Ball cup and careful hand rotation | Dedicated ball spinner |
| Abrasives | Abralon or comparable pads in 500, 1000, 2000, and 4000 grit | Complete grit range for precise finish matching |
| Lubrication | Spray bottle with water or approved cleaner | Controlled spray or resurfacing system |
| Cleaning | Microfiber towel and bowling ball cleaner | Multiple clean towels and dedicated cleaning station |
| Coverage control | Permanent marker for surface quadrants | Marking system, spinner, and inspection lighting |
| Protection | Nitrile gloves, mask, covered workspace | Dust-controlled work area and professional protective equipment |
Use real abrasive pads rather than cheap foam sheets that load up quickly and cut inconsistently. Keep the pad flat, wet enough to carry debris away, and clean between stages. The guide to bowling ball maintenance kits can help you compare basic and more complete setups, but you don't need a complicated cabinet or lighting rig to begin.
Prepare the workspace
Cover a flat surface and keep the ball away from loose dust. Marking the shell into quadrants helps you rotate through the same areas instead of repeatedly sanding the easiest section. Wear gloves and a mask, and unplug the spinner before changing pads. Those habits are simple, but they prevent contamination and accidental contact with moving equipment.
The Full Grit Progression Step by Step
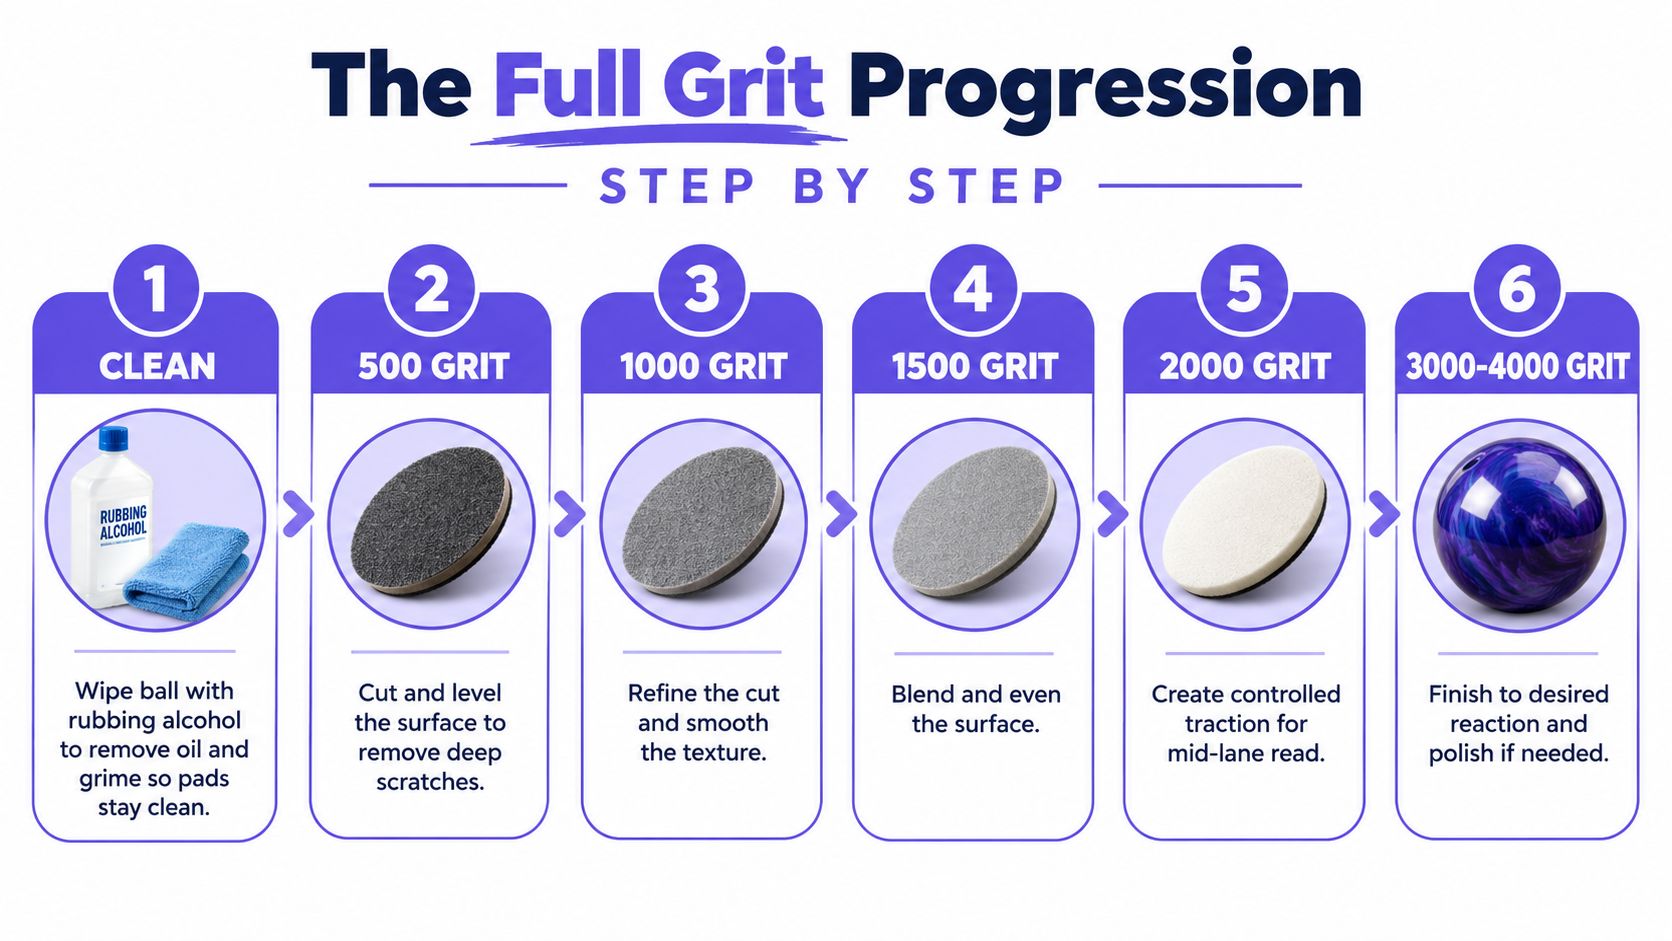
A proper resurface removes the old texture and replaces it with a controlled finish. Start with the cleanest ball possible, then move from coarse to fine abrasives in sequence. The exact progression can vary, but a common complete path is 180, 360, 500, 1000, 2000, 3000, and 4000 grit. The Storm ball care guide emphasizes full coverage and sequential progression because each finer pad needs to remove the scratches left by the previous one.
1. Clean and inspect
Wipe the ball with rubbing alcohol or an approved cleaner. Remove oil from the track area, dry the shell, and inspect for cracks, deep nicks, damaged grips, or raised inserts. Sanding won't repair structural damage, and a pad can catch on a grip that isn't flush.
2. Establish the base cut
Use the coarsest grit required for the finish you want. If the ball only needs a light refresh, starting at 1000 or 1500 may be sensible. If the old surface is badly glazed or you're making a major change, a 500-grit base cut may be appropriate.
Keep the pad flat and use steady pressure. Work across the entire surface in overlapping passes, including the track area. A ball spinner makes this much easier. The surface should show an evenly altered, dull appearance before you move on.
3. Refine sequentially
Move through the next grit only after the prior scratch pattern has been replaced across the whole shell. Practical progressions include 500 to 1000 to 1500 to 2000, followed by 3000 or 4000 when you need more length. Jumping from 500 directly to 4000 is a common shortcut that doesn't work. The fine pad can soften the coarse marks, but it may not erase them uniformly.
Clean the ball and remove residue between every stage. Reduce pressure as the grit becomes finer. One manufacturer guide illustrates the principle with approximately 30 seconds on all four sides at 500 grit, about 10 seconds at 1000, and about 5 seconds at 4000, as described in this resurfacing technique guide.
4. Keep coverage repeatable
Rotate the ball through multiple sides or passes so the final finish forms an even cross-pattern rather than a set of hand-shaped trails. Count passes, keep the spray consistent, and don't ride the pad aggressively over finger holes. If you polish after the final sanding stage, use a clean pad and treat that as a separate finishing operation.
The final surface should look uniform under the same light. If one area is glossy while another remains dull, the job isn't finished, regardless of how many grit steps you completed.
Matching Surface Finish to Lane Conditions
Grit is a motion choice, not a decoration. Lower finishes create more traction and generally make the ball read sooner. Higher finishes and polish reduce surface friction, allowing more skid before the ball changes direction. The right choice depends on oil volume, transition, coverstock strength, layout, and your rev rate.
A strong asymmetric solid at 1500 can read far earlier than a weaker pearl at the same nominal finish. That's why copying a professional's surface from a video often fails. You're copying one variable while ignoring the ball, layout, speed, rev rate, and lane pattern that made the adjustment useful.
Use the finish to shape the reaction
| Grit Range | Lane Condition | Typical Ball Motion |
|---|---|---|
| 500 to 1000 | Heavy oil or a ball that skids too long | Earlier traction, stronger midlane read, less retained skid |
| 1500 to 2000 | Medium volume or a need for balanced traction | Controlled read through the midlane with usable continuation |
| 3000 to 4000 and polish | Cleaner, drier, or transitioned lanes | More length, later breakpoint, and a smoother or sharper backend depending on polish |
For heavy oil, the lower range can give the cover enough texture to read the lane. On a medium house shot, 2000 grit is commonly used as a league benchmark, with bowlers moving to 1500 when the ball is too clean or to 3000 when it hooks too early, according to surface management guidance. Treat that as a starting decision rule, not a universal prescription.
Watch the lane, not the number
If the ball hooks before the breakpoint and loses energy, increase the finish. If it skids past the intended breakpoint and never recovers, lower the finish. If the lane has transitioned, a smoother surface may control the first part of the lane, while a cleaner surface may help you retain energy when friction has accumulated outside.
Learning how to read bowling lane oil patterns will make these decisions more useful. Surface changes work best when they respond to observed ball motion rather than a finish chart treated as law.
How Often You Should Actually Resurface
More sanding doesn't automatically mean better performance. Every aggressive pass removes coverstock, so sanding repeatedly during one session can shorten the ball's useful life and may create durability or warranty concerns. A ball that changed reaction because of lane transition doesn't necessarily need a new surface.
Public guidance varies widely. One analysis notes that highly textured surfaces may need attention as often as every three games, while other recommendations place maintenance around 20 to 30 games or suggest routine checks after three to six games, as documented in this discussion of bowling ball surface wear. That spread tells you not to use a single calendar rule for every bowler and lane environment.
Separate checks from full resurfaces
Inspect the ball after sessions and look for a dull area turning shiny, a visible loss of the factory texture, or a reaction change that remains after proper cleaning. A light touch-up may be enough when the finish has only drifted slightly. A full grit progression makes more sense when the cover is heavily glazed, the track area is uneven, or you're intentionally changing the reaction profile.
Clean the ball after every session and wipe oil from it between shots when conditions are greasy. Use a dry microfiber towel that isn't carrying residue from another ball. Good cleaning slows contamination, but it doesn't prevent surface wear forever.
Build a log rather than guessing. Record the date, approximate use, lane condition, finish applied, and ball motion. You'll learn whether your equipment needs frequent checks or only occasional resurfacing, and you'll stop confusing lane transition with coverstock failure.
Your Resurfacing Checklist Before You Roll Again
Keep this checklist with your pads. It prevents the silent errors that make technically correct sanding produce inconsistent ball reaction.
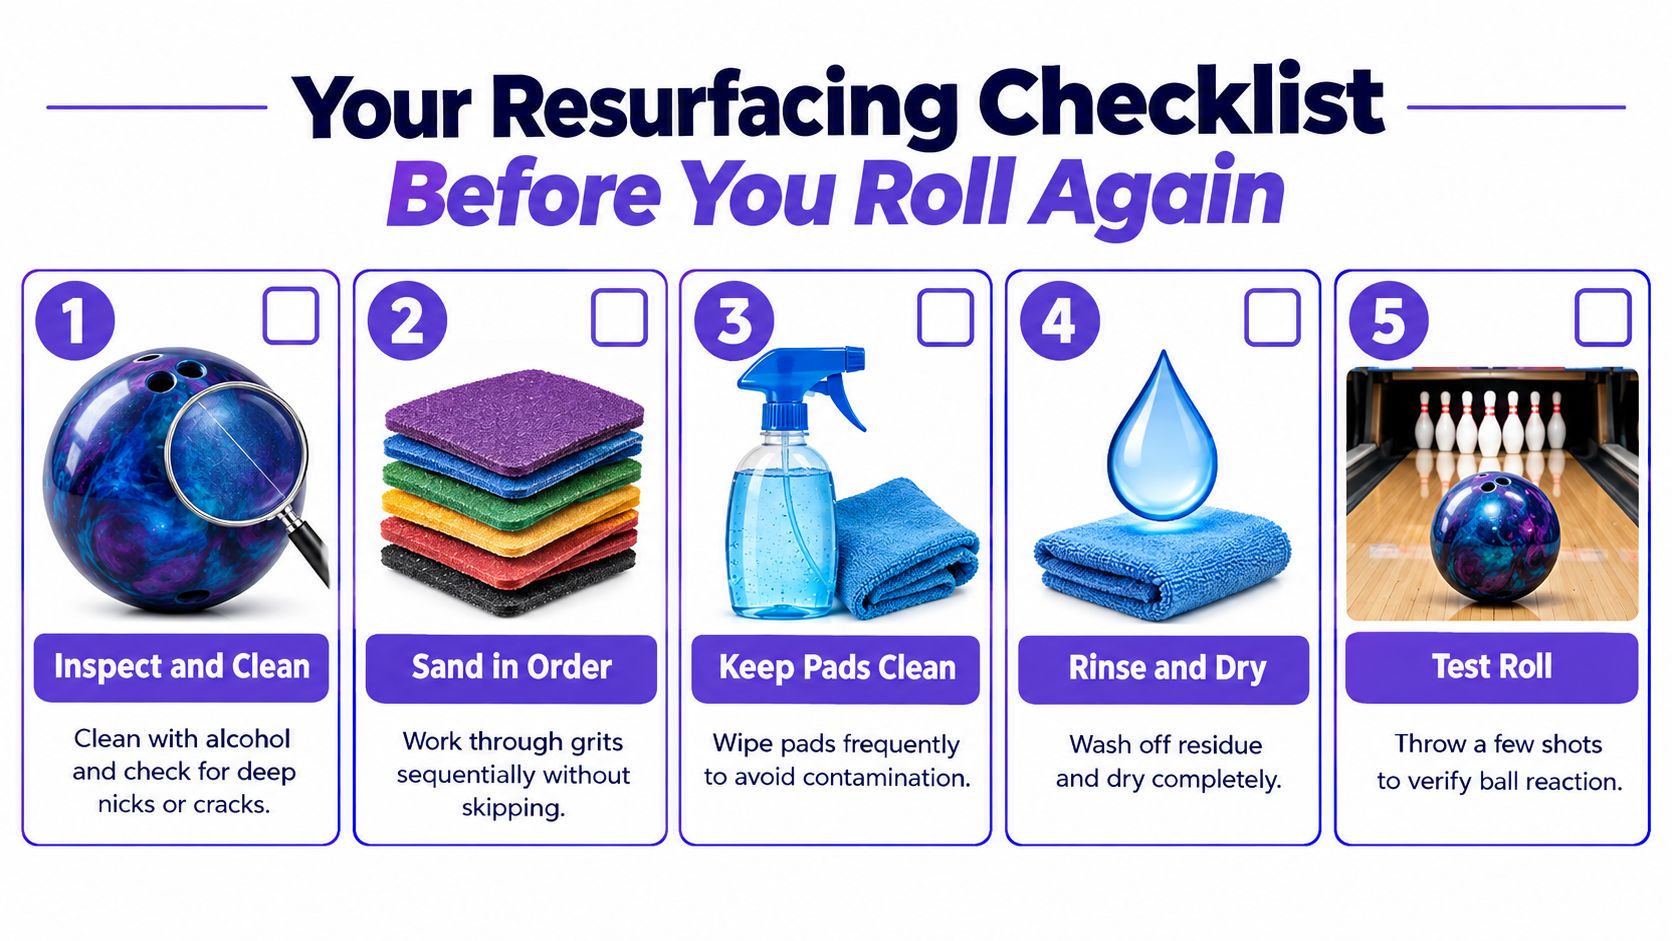
- Inspect first. Clean the ball, check the track area, and look for cracks, deep nicks, or raised grips. Decide whether you need a light scuff or a complete resurface.
- Set up cleanly. Cover the workspace, prepare the spray bottle, mark quadrants if working by hand, and check that each pad is in good condition.
- Choose the finish with intent. Start from the lane problem. Use more texture for earlier traction and less texture for added length.
- Sand in order. Work across the entire surface with overlapping passes. Progress from the chosen coarse grit through finer stages without a damaging shortcut. Clean the ball between grits.
- Inspect the finish. Look for uniform dullness or uniform refinement under consistent light. Missed areas matter more than speed.
- Rinse and dry. Remove abrasive residue, wipe the shell thoroughly, and let it dry before storage or use.
- Test the reaction. Throw a few shots and watch the read, breakpoint, and continuation. Don't make another surface change until you know what the first one did.
- Log the result. Write down the finish, date, lane condition, and observed motion. Labeling the ball or storing the finish information in your phone makes the next adjustment repeatable.
Shop standard: If you can't see a consistent finish across the whole shell, you don't yet have a consistent surface.
Use the record to decide whether the ball needs maintenance or whether the lane changed. That distinction saves coverstock and keeps your equipment predictable.
Bowling Gear Reviews offers independent, hands-on reviews and practical guides for bowling balls, shoes, bags, and care accessories, with advice focused on real lane use rather than manufacturer claims. Visit Bowling Gear Reviews to compare equipment and find maintenance guidance that helps you make your next surface adjustment with more confidence.
